Showing posts with label FREEBIE. Show all posts

5 Valuable Tips For Organizing Supplies In The Classroom


organized classroom full of tables and chairs


Many years ago, I had the option of switching from desks to tables in my first grade classroom...and I JUMPED at the chance! (Now when I say many years ago...I LITERALLY mean MANY YEARS AGO....we are talking 20 or more! (Feel free to comment on how well I look for my age...you never know when a random gift card will be thrown into the mix for best comment from a reader...:) just kidding!)  But I really did jump at the chance, and I will tell you why...
I HATED DESKS!
I hated that they NEVER stayed in one place. I hated that the kids ALWAYS had the lids up and their heads inside of there...as if looking for some long lost treasure...that didn't actually exist! I hated that things went into those desks...NEVER TO BE SEEN AGAIN...ALA THE BLACK HOLE! And I absolutely hated when I would have to GULP...stick my hand inside of one of those "disaster zones" to help a student look for something important because LORD ONLY KNOWS WHAT SLIMY, WET, STICKY SUBSTANCE then was stuck to the side of my hand.

overwhelmed teacher at desk

GasP  sHiVeR  aCcKk  BLeeCckK

So we started using tables and I never turned back. The main questions I get when I tell people I LOVE tables instead of desks are these:

1. How do you keep the kids from talking?
and
2. What do you do with all their stuff?

Well...the answer to question #1 is....

HahaHahahaHahaHaHahaHa 
that's funny...I'm a teacher..not a magician

laughing emoji
But the answer to question #2 I can give you in 5 easy steps


Table Crates

crate on floor next to table to collect student supplies


Each table is assigned it's own table crate. You can get these crates from lots of different places in lots of different colors, especially in the summer when college students are getting their dorm rooms set up. I will just caution you that in this case...CHEAPER IS NOT NECESSARILY BETTER. I realize you may not have a lot of money to spend on things like crates and bins, however, having done this for so many years I can tell you for certain...when you go with the cheaper version of storage items that the students are going to be using daily...they WILL NOT HOLD UP WELL, and you WILL IN FACT be buying new ones again next year. So, paying double the first time just may save you time and money in the end. The crates I ended up settling on came from Big Lots.
The crates are where my students keep their take home folders, their journals, math books, science books, and any other items that we use repeatedly throughout the day/week. Each crate contains an expandable file. 
expandable file to collect extra papers and folders to keep them organized

This is to help the students further organize their materials. So, all of the journals and/or morning work booklets are kept together in the expandable file where they can easily be found and easily accessed when needed.
 Take Home Folders

inside of take home folders to reveal labels placed on pockets...papers to leave at home, papers to bring right back


I provide each student with a sturdy folder at the beginning of the school year which will be their take home folder. *This is something that does not have to be provided by the teacher, but could instead be asked for on a supply list sent to parents at the beginning of the year. I label the pockets of the folder to help keep the lines of communication open with families and students. Then, when I pass back papers or when we pack up our things at the end of each day, we take time to talk about which side of the folder each paper belongs on...Leave At Home, or Bring Right Back **Teacher Hack...Papers to be LEFT at home go on the left side of the folder, and papers to bring RIGHT back go on the right side of the folder...a-ha! A teachable moment! #youarewelcome
 Table Baskets

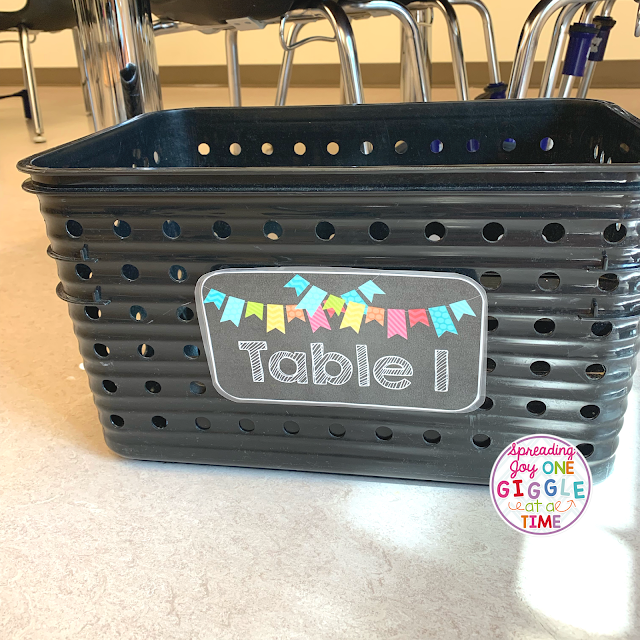
Table basket showing table number 2 label


Each table has it's own table basket. I have tried many different shapes and sizes of baskets over the years, but the ones I have settled on, that have held up the longest have been these caddies from WalMart. Each section is labeled, to help the students stay organized. This is important, because little kids are not naturally going to organize and compartmentalize their supplies on their own...they just aren't. So expecting them to, and then getting frustrated when they don't really isn't fair....is it? 
In the baskets I use in my classroom there are three compartments, so they are organized simply: 

pencils
I provide each student with TWO sharpened primary sized pencils labeled with their
name. **Teacher Hack- Print out several sets of labels with students names on them. These can be used for SO MANY different things throughout the school year.


table basket showing pencil compartment label

crayons 
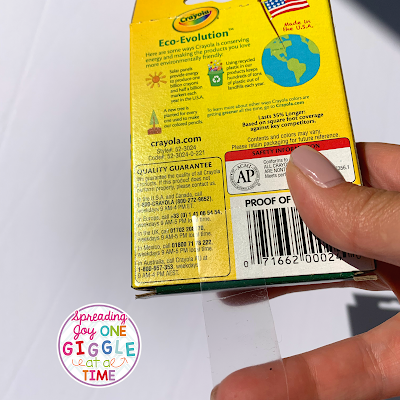
Each student has a 24 pack of crayons. I always label these with their name and tape the bottom of the box shut to avoid "crayon catastrophes" as the weeks go on.


box of crayons being taped shut on the bottom with cellophane tape

table basket with crayon compartment label showing

learning tools
Each basket has two sets of learning tools so that they can be shared by
the students sitting side by side. *More information about how and when we use learning tools in our classroom will be coming in a future blog post!
You can click HERE to check out the learning tools in my TPT store.

table basket with learning tools compartment label showing


table sign freebie product from One Giggle At A Time

***If you would like this set of table signs for your classroom...which includes table crate signs, table basket signs, and matching signs to hang above the tables....
 you can download it HERE  

 Community Supplies

10 drawer colorful cart from Michaels knobs removed

labels for 10 drawer cart crayons, post it notes, scissors, glue sticks, etc

All other supplies that the students need are kept together in a cart with multiple drawers that I purchased at Michaels. The students can access the supplies in this cart whenever they need them (glue sticks, scissors, extra crayons, markers) I kept the knobs off and just added these labels to the fronts of the drawers.

 Clear Expectations


inside of take home folder showing examples of  papers to be brought back to school and papers to be left at home


But in all honesty, the only way to get this to go smoothly...to work like a charm...to make you sit back proudly and say "wow"...is to give your students clear expectations. That's right...no matter how well you think it all through and no matter how beautiful you make it look, if you do not clue those kids in on what you expect, clue them in on EXACTLY what it is you want them to do with those supplies and how you want them to do it....
it will still look like a DISASTER ZONE!
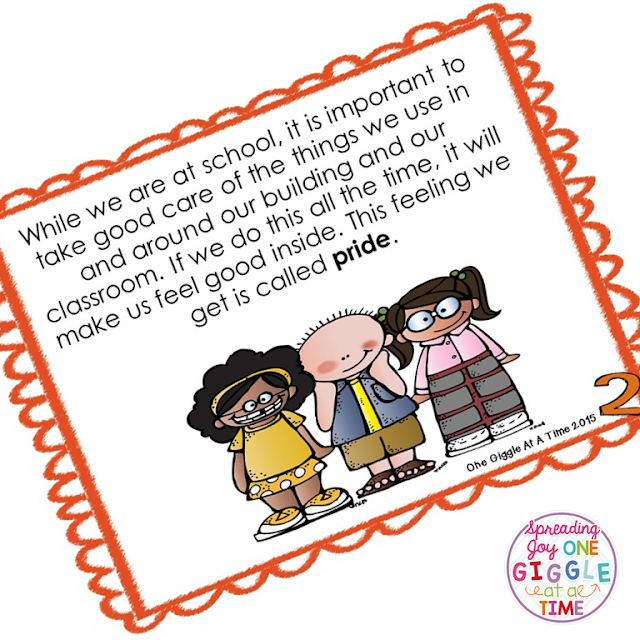
 So show them how to use the crates. Model how to use the table baskets. Act out how to put papers in the take home folders. Read specific social stories to help explain the expectations you have...In this can I use a Social Story all about Respecting Property.


https://www.teacherspayteachers.com/Product/Social-Story-Respecting-Property-1899318

https://www.teacherspayteachers.com/Product/Social-Story-Respecting-Property-1899318

https://www.teacherspayteachers.com/Product/Social-Story-Respecting-Property-1899318

Click HERE to learn more about this Social Story.

 And do these things over, and over and over again
It may take a little extra time, and it may seem a little redundant...
but in the end
you will be so glad you did!


Are you ready to get your classroom supplies organized and your room running efficiently? Your students are so lucky to have a teacher that takes the extra time to help them understand the importance of taking care of their things. If you have any questions I would be glad to answer them, and I look forward to hearing from you about your room set up...tables? desks? Have you tried any of these things already or maybe have some great ideas of your own to share.

Join the VIP CLUB

Sign up to get weekly tips, tricks, freebies and all things One Giggle!
    We won't send you spam. Unsubscribe at any time.
    Powered By ConvertKit


    0

    Making A "No Name Board" For Your Classroom and Your Sanity


    Learn how to make a No Name Board for your classroom to help manage your paperwork and your sanity!
         Hi Friends! Today I want to show you how to make a "No Name Board" for your classroom. What is it and why do you need one? Well, let me just tell you...
         So, a "No Name Board" is a place to put those papers that INEVITABLY get turned in NAMELESS... EVEN AFTER YOU HAVE SAID 7,985,453,213 TIMES "Don't forget to put your name on your paper." It is, essentially, a place to put those poor, nameless papers. And...for some reason, those NAMELESS papers that NO ONE would claim before...suddenly, magically, miraculously seem to reconnect with their owners once they have been "featured" on this "fancy-shmancy board".
         But, the why you need one of these boards in your life IMMEDIATELY may be the most important part in all of this...
    TO SAVE YOUR SANITY!
         Because, here is the deal, you and I both know...it is going to happen. No matter how many times you say it, sing it, repeat it, chant it, dance it, and act it out together in cooperative groups...there WILL BE students who will turn in their papers without names on them... In the past this may or may not have been something that has made you tiptoe very close to the edge of your sanity. But NO MORE! I am here to save your sanity with the "CUTENESS FACTOR" of the "No Name Board".

         Now hear me out...I am a firm believer that 
    FUNCTIONALITY + CUTENESS = HAPPINESS x INFINITY
    EVERY SINGLE TIME!
         So, yes, there will always be papers without names on them. Yes, it is irritating. But now, when you go to hang them on the "No Name Board"...you will immediately stop and think to yourself, "Look how cute that "No Name Board" is! I am so glad I made that absolutely cute thing and I have it in my life!" Then you will forget all about being irritated that those few papers don't have names on them and you will go and drink a cup of coffee and celebrate your FANTASTIC self!


                               *To get yourself a coffee mug like this one, click on the picture above.*

    Here is a video showing you the steps I went through to make my "No Name Board".


    As promised in the video, here are the steps for making the "No Name Board" written out for you.

    Learn how to make a No Name Board for your classroom to help manage your paperwork and your sanity!
       
    You can get all the supplies you see here from Hobby Lobby and Michaels, and if you don't want to go to both stores, I am sure you can find substitutions for any of these products in either store or even in your own home. (For instance, I already had the clothespins, paint, and both kinds of glue at home, just waiting to be used for a fun project!) *I just noticed I did forget to take a picture of the q-tips. Sorry...you also need a couple q-tips!

    How To Make A "No Name Board":
    1. Evenly space five clothespins at the bottom of the board. You want them to hang over the edge. Use a q-tip to apply the wood glue to the top portion of the clothespins (from the end to the metal piece) and then stick them onto the board. (The use of the q-tip is so that you don't get goopy wood glue all over everything...or maybe that is just something I do when I am crafting.) Let those dry for a few hours. (The bottle says 24 hours...I cannot wait that long when I am creating CUTENESS! But you can do what you want!)

    2. Spray paint your board and clothespins black.(Don't forget to do the edges.) Let paint dry. (I would say something about watching paint dry here...but I won't.)

    3. Now measure and cut the ribbon to edge the board with. Then use the Tacky Glue to glue the ribbon down with. (I don't use a q-tip for this glue, because it usually comes out of the bottle pretty controlled.)

    4. Next, you are going to make your ribbon knots. Choose four ribbons for each clothespin. Cut the ribbons in half and set half aside. Once you have them in half, then holding them together, fold them in half, leaving about a  1 1/2" or 2" loop at the top. Tie the whole bundle in a knot. Do this for each clothespin. Using the Tacky Glue, glue the ribbons down by putting the glue onto the clothespin and then pressing down on the ribbons.

    5. Last, you need to position your letters onto the board. This pack of letters only had one alphabet set in it, but we need two N's. Instead of buying two letter packs, I just used the Z turned on it's side to make the second N. (Take that- Company that made the letters but only sells one alphabet per pack!!! What can you spell with only one of each letter??!!!) Once you have your letters positioned how you want them, then glue them down using the Tacky Glue. Leave the board set out to dry. (Probably overnight this time.)

    6. You can put whatever kind of hardware you need to on the back to hang it. I put thick strips of magnets on the back of mine and hang it on my whiteboard because we cannot hang things on the walls at my school. (It takes quite a few magnets to hold it up.)
       

    This is what your final project will look like!

    Learn how to make a No Name Board for your classroom to help manage your paperwork and your sanity!

    TOTAL CUTENESS...RIGHT!!???

    In the video I told you we sing a song about putting our name on our paper in my class. It does work for the majority of the kids. If you would like a copy of it you can get it by clicking on the picture below.

       
         Oh, and here is a close-up picture of the big paper clips from Michaels that I used the extra ribbon on. I just tie the ribbon into knots at the top. I usually put three or four ribbons onto each paper clip. These make GREAT gifts for team members!


    Use leftover ribbon to make these oversized, functional fun paperclips!

    Send me pictures of your "No Name Boards" and your paperclip creations! I would LOVE to see them so I can get my HAPPINESS x INFINITY out of their FUNCTIONALITY + CUTENESS!
    Thanks for stopping by!


    0

    The Perfect Way To Practice Using Reading Strategies Simultaneously!


    Looking for ways to practice using reading strategies with your students? This Super Sentence Showdown Game is the perfect reading strategy practice!

         Hi Friends! Today I want to share with you one of my favorite ways to practice reading strategies with my students. Now, first of all, let me start off by saying...I KNOW that the BEST way to practice using reading strategies is to ACTUALLY READ!!! And I am here to tell you, to be successful as a teacher of firsties, you MUST, MUST, MUST give those babies LOTS of time and opportunity to read independently so that they can practice what you are teaching them.
         However, I also know from doing this for A BAZILLION-TRILLION years (have you looked at my picture?) that firsties need "controlled practice" as well. By controlled practice, I mean things like guided reading, shared reading, conferencing, partner work, games etc. so that they can be held accountable for what they are doing, and so that you as the teacher can make some observations about what it is they need next as learners. This game I want to share with you today is one of those "controlled practice" situations that my students and I LOVE doing together!


    Looking for ways to practice using reading strategies with your students? This Super Sentence Showdown Game is the perfect reading strategy practice!

         So I call this game The Super Sentence Showdown. (You may know it by another name. I read about it in a book many years ago and have just modified it to work with my students.) What I LOVE about it is that the kids have to use several reading strategies simultaneously to figure out the missing words in the sentence, and they have to use teamwork to do it. (So, a child who isn't quite "getting" the whole reading strategy thing yet, is getting to see other kids in action, and everyone is benefitting from listening to the way others problem solve and think!) In this game, students need to use prior knowledge of their world, prior knowledge of how language is commonly used, as well as teamwork and cooperation to form meaningful sentences. The goal is to improve reading abilities in students, particularly their ability to use prior knowledge, to monitor and to self correct while reading.
    Looking for ways to practice using reading strategies with your students? This Super Sentence Showdown Game is the perfect reading strategy practice!
    Add caption


         So this is how we play. I divide the class into two teams. I try to make the teams even in terms of ability..but that is a secret, so don't tell the kids! I then choose a Team Captain for each team. The Team Captain is going to be in charge of being the "spokesperson" for the group. (I do this to avoid someone on the team shouting out a word like "pizza" that has nothing to do with the sentence, causing the team to lose their turn, and then that someone having no one to play with at recess because they had no self control!) Now I need to be clear here...the Captain does not get to make all the decisions and do all the answering alone. So be careful to choose someone who isn't a control-freak, or you will spend the entire game taking care of that issue! The Captain needs to listen to the suggestions of the team, and then share those answers out.
         Each team gets 3 "free-letter cards" to be used at their discretion.(Free-letter cards are used during the game to reveal a letter in an unknown word. Only one free-letter card can be used during a turn.)

    Looking for ways to practice using reading strategies with your students? This Super Sentence Showdown Game is the perfect reading strategy practice!      

    Now to start the game, I show the students a sentence I have prepared with all but one word missing. (NOTE: The length of the blanks match the length of the missing words. This is to remind students that when decoding unknown words while reading, the length of the word is a clue that can be used to help figure out the unknown word. (i.e. it would be silly to guess “dinosaur” for a word with only three letters.)  

    Looking for ways to practice using reading strategies with your students? This Super Sentence Showdown Game is the perfect reading strategy practice!
                    Next, I engage students in conversation about the one word revealed. (This is a step you will repeat at the beginning of each round.) The word revealed should always be a high-content word, so children can guess related words and topics that might be hidden in the sentence. For example, you would say, "We know this sentence has the word teacher in it. What other words might you expect to find in a sentence with the word teacher in it?" Students might offer suggestions such as class, students, school, lesson, etc. Remind students that this is the same thing we do when we get a new book to read. We get our mind ready to read by thinking about what the book might be about. 
                On their turn, each team will begin by selecting a number corresponding to the word they would like revealed. (Each team can only have one word revealed per turn.) Choosing a word to be revealed is a strategic decision. I gain a great deal of knowledge from listening in on the decision making of the students. I pay close attention to which students reread the sentence, which students make sensible predictions, and which students are able to use prior knowledge of how the English language works to guide their decision making. It is important to remind the team to work together to make a decision, but only the captain does the talking for the group.
                  After I reveal the requested word, I remind the team of their three choices:
    1. The team can now collaborate and make a guess at a missing word in the sentence. (i.e. "We think number one is "the".) Again, only the captain makes the request.
    2. The team can use a free-letter card to assist with their guess of a missing word. (i.e. "We want to use a free-letter card for number two.")
    3. The team can pass. (i.e. "We don't have a guess, so we want to pass our turn.")

         A team's turn continues until they guess incorrectly or they pass. Each time they guess correctly, they earn points toward their score.
    SCORING:
    2 POINTS- For every word guessed correctly without any letters being revealed.
    1 POINT- For every word guessed correctly after a free-letter card was used on that word.
                  (Regardless of which team used the free-letter card.)
    10 POINTS- For guessing the entire sentence.

    NOTE: WHEN ONLY ONE MISSING WORD REMAINS IN THE SENTENCE, IT IS NEVER REVEALED.
    Looking for ways to practice using reading strategies with your students? This Super Sentence Showdown Game is the perfect reading strategy practice!
    Here is an example of how a round may go:
    The first team asks for word number three to be revealed, so the board now looks like this:

    ___ ___ important ___ ______ ______ ____ teacher _____ __________ .

    Most students will now be able to guess that the word in the number-two spot is is. Some may suggest the, because it would be possible to say "the important __" in a sentence. They also will probably be able to guess that the number-seven word is the. If the team guesses correctly they will score two points per correct word, and the board will look like this:

    ___ is important ___ ______ ______ the teacher ______ __________.


    Strategic players might now suggest using a free-letter card to get a hint at word number four. Supplied with a t, they will probably guess to, scoring one additional point. (There is no limit as to how many points a team can score in a round. Sometimes they get on a role and figure out the entire sentence. That is ok. Let the other team go first in the next round. Remember...We WANT them to be able to do this!)

       The game continues until the entire sentence is complete. The captain of the winning team reads the
    entire sentence back to the group to win.

    It is important to listen when the teacher is talking.


       The game moves quickly because with each turn a complete word is revealed, offering significant
    clues to the players. I always encourage rereading as the main strategy for making good predictions in
    this game. This reinforces for the students the importance to continually read for meaning.
         As the year goes on and students grow as readers, I make the sentences more complex and the
    content richer. It is especially fun to include content we are learning in our science, health
    and social studies lessons. I also encourage the students to suggest sentences themselves, either
    original ones or ones lifted from the books they are reading.   
         If you would like to try playing Super Sentence Showdown with your students I have created some FREEBIES you can use to help keep the game organized and fun! Click on the picture below to pick up these FREEBIES!


         I have also created an entire set of 50 prepared sentences and projectable gameboard pages you can use for a NO PREP, cut and go version of the game. I like this, because I don't have to take the time to come up with the sentences for each round of play, and I don't have to take time to prepare the charts each time. I keep the sentences together on a ring, and then add the new ones the students suggest to the blank cards included. I have also included the directions  with the sentence cards, so if a question comes up, you can look right there in your stack of cards for the answer! You can click on any of the pictures below for the entire Super Sentence Showdown Game.


    2

    Earth Day Fun and Freebies

    Fun Earth Day activities, crafts, books and a freebie to use in your classroom!

         Welcome Back Friends! Happy Spring and Happy Earth Day! I love this time of year. There are so many fun activities to do to celebrate the excitement that Mother Earth brings to us in the spring. Today I want to tell you about a few of my very favorite activities to do for Earth Day, and to bring you a little FREEBIE to thank you for stopping by!


    Fun Earth Day activities, crafts, books and a freebie to use in your classroom!

         My favorite Earth Day craft is a whole class, cooperative craft and it is a magazine collage of the earth. The most time consuming prep for this craft is 1. collecting old magazines and 2. cutting up any pages that have shades of blue, green, or brown into various sized squares. (Tip: Parent helpers and older students are FABULOUS for this part of the activity!)
         Next, you need to draw the earth onto a blue piece of  bulletin board paper. I shaded in the parts that were land with pencil, so that the students wouldn't get confused as they were working. Then let the kids get started gluing on the magazine squares. We usually work on our Earth throughout the entire week of Earth Day doing a little at a time. The students love that we are upcycling the magazines to make something new and beautiful, and that they get to work on a project as a whole class.

    Fun Earth Day activities, crafts, books and a freebie to use in your classroom!

         When the project is complete, I mount it onto black bulletin board paper and put it up for display.


    Fun Earth Day activities, crafts, books and a freebie to use in your classroom!
       
         One of the other things I love about Earth Day is all the great books there are to go along with it! Some of my very favorites are: Just A Dream by Chris Van Allsburg, Someday A Tree by Eve Bunting, Recycle Every Day by Nancy Wallace, Oil Spill  by Melvin Berger, Where Does All The Garbage Go? by Melvin Berger, and A Pig Tale by Olivia Newton John (Yes....GREASE...SANDY...Olivia Newton John).

    Fun Earth Day activities, crafts, books and a freebie to use in your classroom!

         My favorite Earth Day activity, is to have my students go outside and read to the trees. Yep, READ TO THE TREES!!! What is better than listening to firsties read? NOTHING! So it is the perfect way to celebrate all that Mother Earth does for us. Our trees LOVE it...and I swear they stand taller every year because of it!

    Fun Earth Day activities, crafts, books and a freebie to use in your classroom!
         
         To help your students celebrate Earth Day while they are reading to the trees, I have some Earth Day Bookmark FREEBIES for you! You can get them HERE.

    Fun Earth Day activities, crafts, books and a freebie to use in your classroom!

        Let me know if your students read to the trees or make a magazine collage earth. I would love to hear about it. Also, what are some of your favorite Earth Day read alouds?
    Have a Great Earth Day!

    0
    Back to Top Pinterest is a visual bookmarking tool that helps people discover and save creative ideas.